Tuesday 28 April 2015

More work on the Active Suspension ram.


Active Roll Control rear Ram

 I have decided to fit a semi-solid bush to the rear mount and as such I have to wait for a new, but very generous friend to make one up for me.

I have cleaned up the ram and its lower seal are ready to do this work later.

Note what looks like a new top Active Ram ball joint.


We see here (above) the ram outer sleeve seal which has a leak due to the dirt ingress from the damaged ram gaiter

Seen here is the lower fluid leak back drain (the little pipe/rubber ring) and and the thin metal flared skirt at the base of  the ram outer sleeve.


To gain access to the ram outer skirt the damaged Gaiter was removed and is as you can see (left) is totally destroyed. 

Again, Jim has come to my rescue and is sending me a replacement one....what a star.


This is the top Ball Joint mount (as seen above) for the rear Active Roll Control Ram , it certainly needs attention and must have all that RUBBISH Powder Coating Removed, hateful stuff !

Internally the socket and bolt shaft /seat are in tip-top condition. Note the above (top) image for how it fits.


Friday 24 April 2015


Activa watch, Retro Cool

Oh dear what have I done


I....just bid via the great Evil-Bay on this.

A small update, the ram is now hanging free on its lower mount.
With a replacement dust/dirt cover bellows on their way (Thanks Jim) in the post this should be fixed very soon. 

After that, one leaking pipe to fix and then its off to get its first UK MOT.

That will need a form of congratulations, hence the watch.


My great thanks to a guy who has been endlessly helpful, Jim your a star mate.
http://www.activav6.co.uk/


Tuesday 21 April 2015

Needing at some time to bite the bullet and get to grips with the rear Active Ram,  today I decided to spend an hour of two cleaning and preparing in the area to make a clean working area.

I removed the Wheel Tray and gave the area a load of Gunk from a air spray gun.  Scrubbed it and Jet Washed, SUN Dried :)


After cleaning I found this split pipe, it was seeping slowly, had I not had ramps and the wheel tray out it would of been a little sod to find when on your back !

Notice the small areas of surface rust....

Of note is the ledge and tray made by the sub-frame mounts, I will post a picture later


To remind you, this is a French made "solution" to  a leaking Ram....


A close up view of this makes me wonder just what they were thinking using gaffer tape, it is a good thing I am going over this car in detail taking into account the few other things such as the brakes and this..
I am beginning to think this car would of quickly deteriorated by poor servicing/costs if I had not saved it from our Tri Coloured friends across the English Channel.


So, having removed two cable ties and some dissolving Gaffer Tape/LHM "paste" called wrapping,  I revealed this delightful sight.


A split/exploded Gaiter...it will be interesting to see under it tomorrow but from what I can see that has taken a thump on the shaft and ripped the bellows part.

OK I bet:  The inner metal shroud is bent as well....we shall see


Saturday 18 April 2015


Lets Switch ends and do the other brakes, here I "do" the right side rear brakes.

The left side was all Ok except for a fair amount of corrosion on the rear disk, other than that the situation is much the same as we see below.


This is what I found, the whole area and the inner sub-frame/pipes and unions where all de-oiled with GUNK

Lots of brushing and many sprays later, a quick wash down and a wipe dry gave me this starting point.  I have to say I am delighted with the condition and how little work is required to really bring the under-body protection to 100%


As I find it I am totally delighted with the condition. This is light work that even if time consuming give great results. These discs are new, as are the pads, they stay.

Do you SPOT what is MISSING ?


yep, no Dust Guard, the disk was loose on its screw as well.


CLEANED, rust treated with phosphate, exposed area zinc'ed and then Chassis Black paint.


When dry sprayed with stone-chip and Wax-oiled (using up  the stuff).


The Dust-Guard is repainted and is drying overnight, it will be attached tomorrow and the alloy wheel (cleaned and black painted inside), refitted with new Wheel bolts.

Friday 17 April 2015

The things they make from  Shiteel in China theses days


Well well well, the things you find when your brakes vibrate at 90+


Here is a prime example which shows very well the reason why I do not (well NEVER AGAIN) trust what other people put on their cars....made form the finest  Chineesium/Crappaoly or Shiteel.

Note the disks have cracked badly.
They have caused bad vibrations above 90 and it was lucky they did not disintegrate which would of been very interesting.


Now that is better !


I have disassembled the Calipers, cleaned and/or renewed a seal or two.

The pistons are good, I wire-brushed and primed with a zinc primer and top coated with Gloss Black Hi-Temp Caliper paint.

All good to go to 140mph and back to zero again..............

Thursday 16 April 2015

Well work carried on when I had time, I dug deeper into the engine compartment on the hunt for the leaking parts.


On removal the part on the right shows signs of the weeping seam fault so many others have reported..


This was dug out from deep in here...a nice placement of a plastic part Citroen.

It lives in a very hot place so care to check it will be given when inspecting the car and getting it Pre'ped for fast work.


All cleaned of years of Southern France mixed with split oil and over greasing.


After all the cleaning and remaking all the electrical connections, applying contact cleaner and a waterproof spray-gel.

I attached the new DeGass Tank, refitted all the removed pipes and plastic, final clean and then fitted a new AirFilter.
All clean and working well with zero signs of leaking...Dry as a Bone !

Wednesday 15 April 2015

Well well well....would you Adam&Eve it....the "180 monster" strikes again !

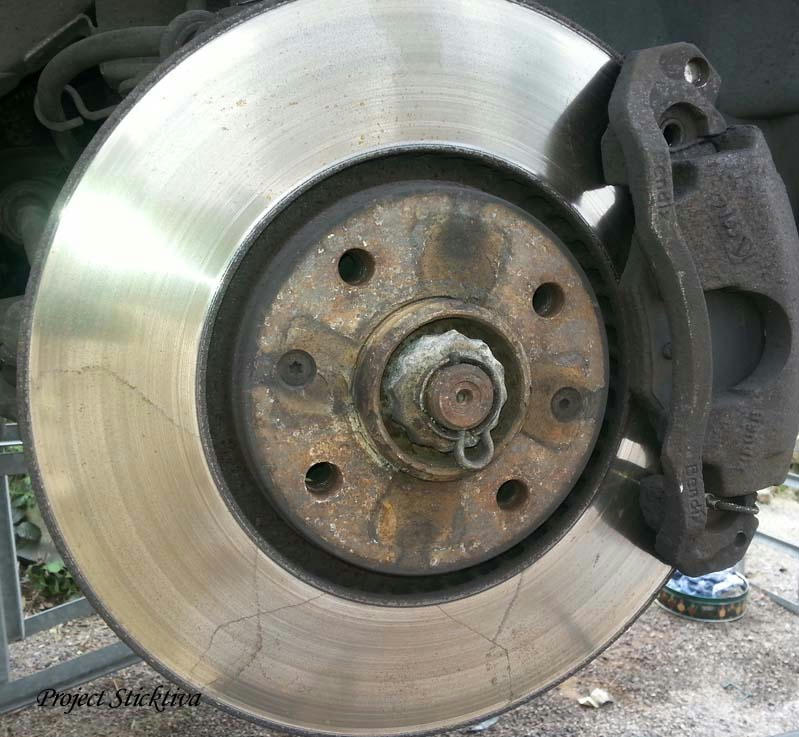
OK, I have the car on ramps to replace the Accumulator sphere, all going well with Suspension depreurising and the car dropping down per book.

Here I am working on the suspension then the 180-Monster attacks ! Every time I work on a Car he strikes :)...work on one thing and you will see a fault that is totally 180 degrees from what you are working on and completely unconnected.

So this time its ???????................as I work on the Suspension....I get a WATER Leak !  geeeze
A split seam in the Degass Tank...RATS !

OK, So I have it seems a leaking "DeGass Tank" also known as a Swirl Pot. This device is a pressure pot with an internal flow that allows micro bubbles (generated in a hot high performance engine when working hard) to be trapped in the water and collect in areas of the engine.
This greatly reduces cooling in certain "HotSpots" and is not unknown to cause head failures and binding pistons or valves....NOT Good.

PSA group in their wisdom make this part in a plastic that over the years goes brittle with heat and pressure changes. So where do they put this ?, yep ...close to the exhaust  LOL...gj

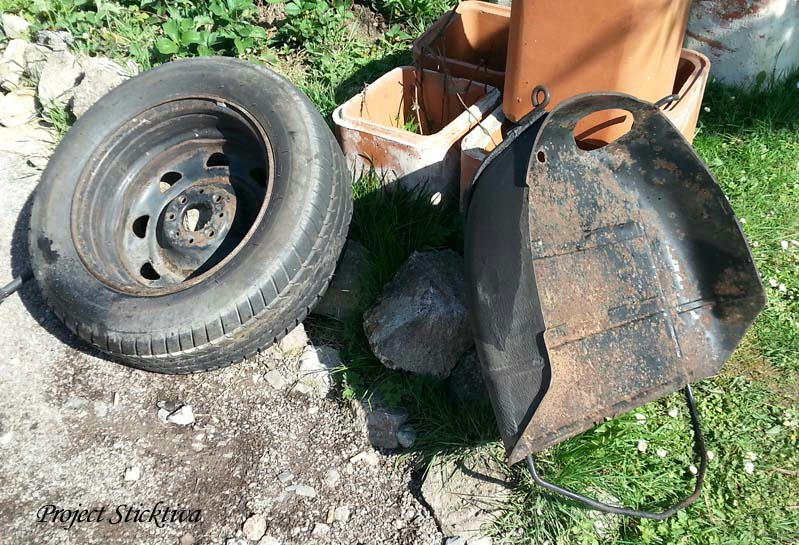
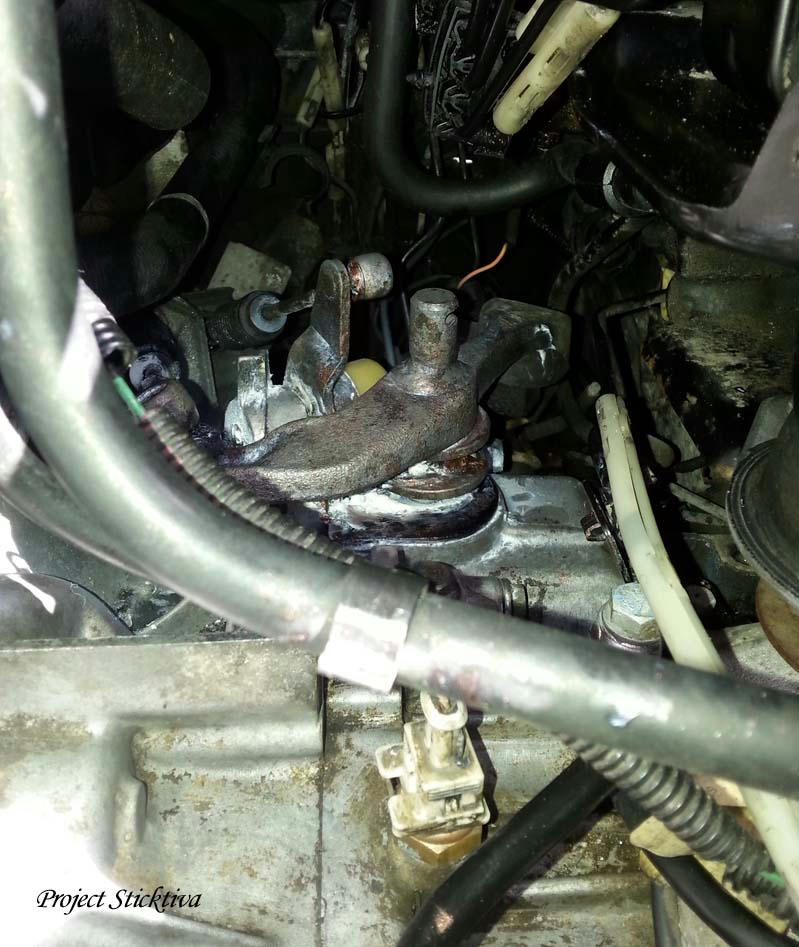
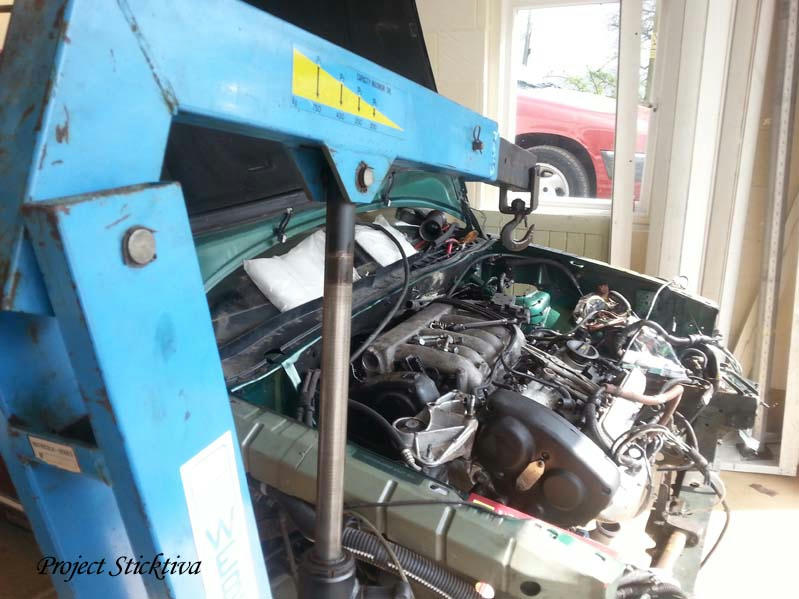
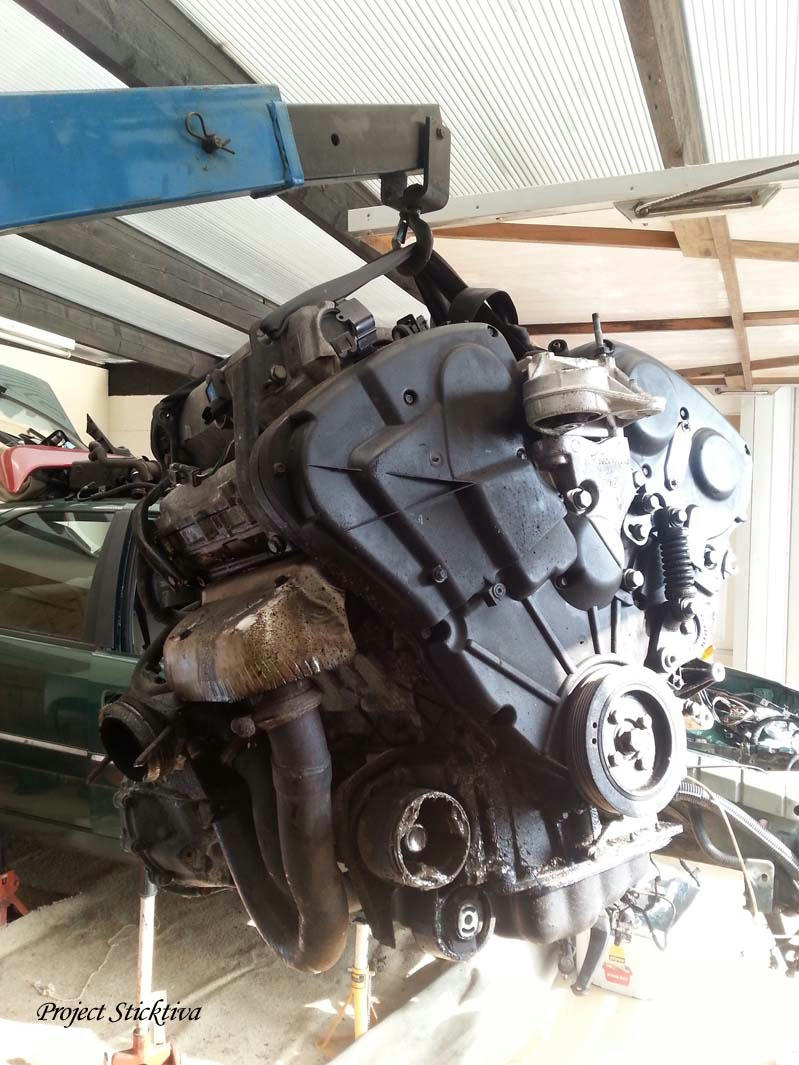
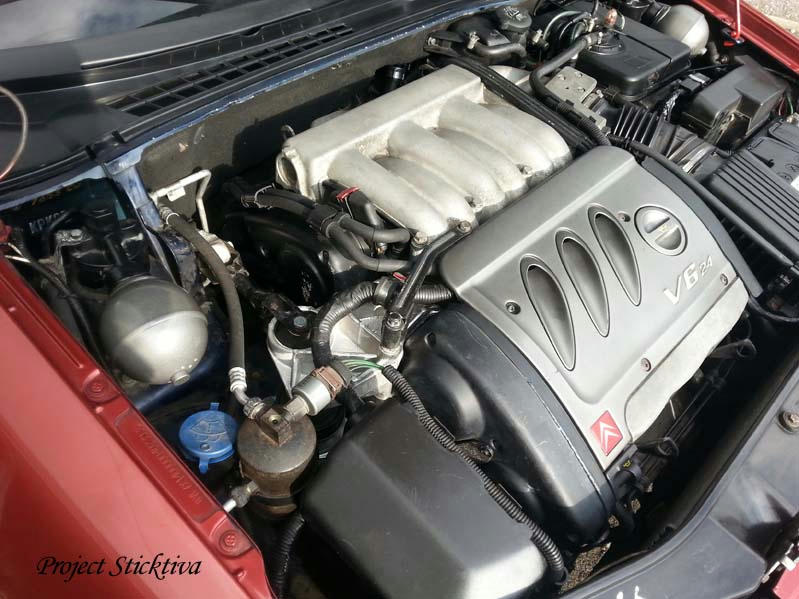
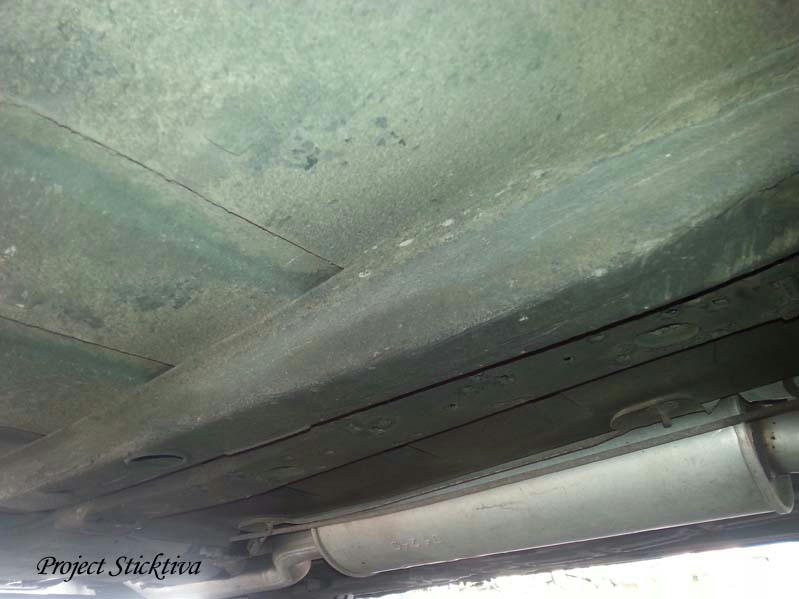
This is how it is positioned (shown on the spare engine out of the car :) )

Deep down in the bowels of the engine as well as at the rear....nice access... uggg NOT


The strip down starts in stages with cleaning as I go.

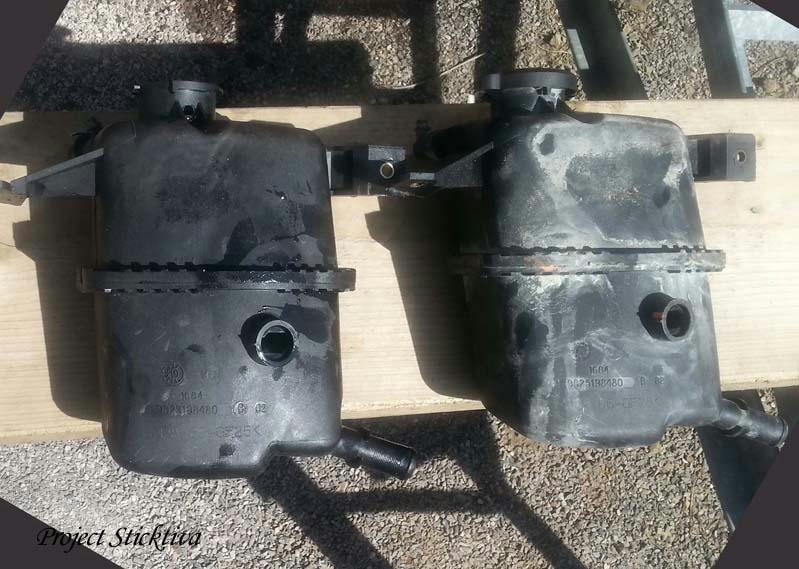
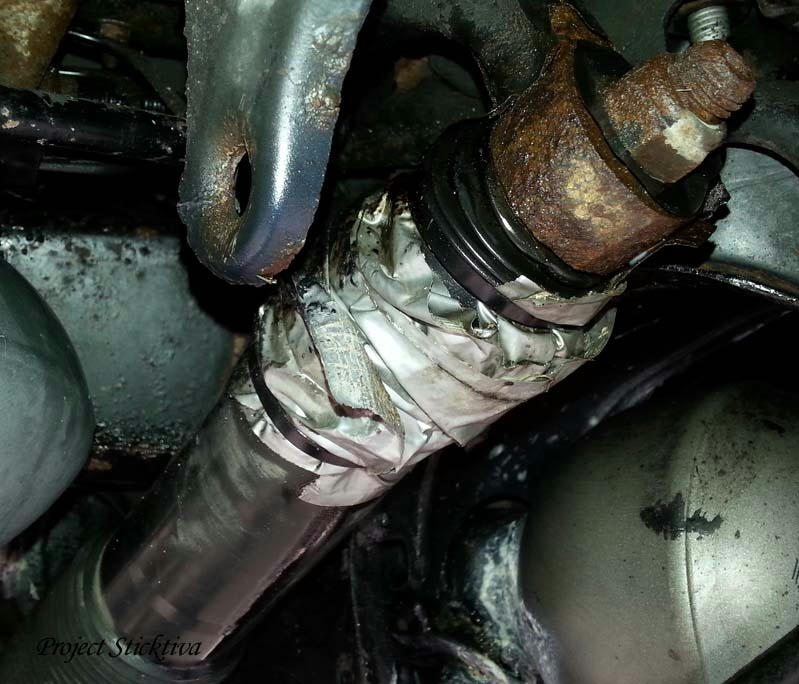
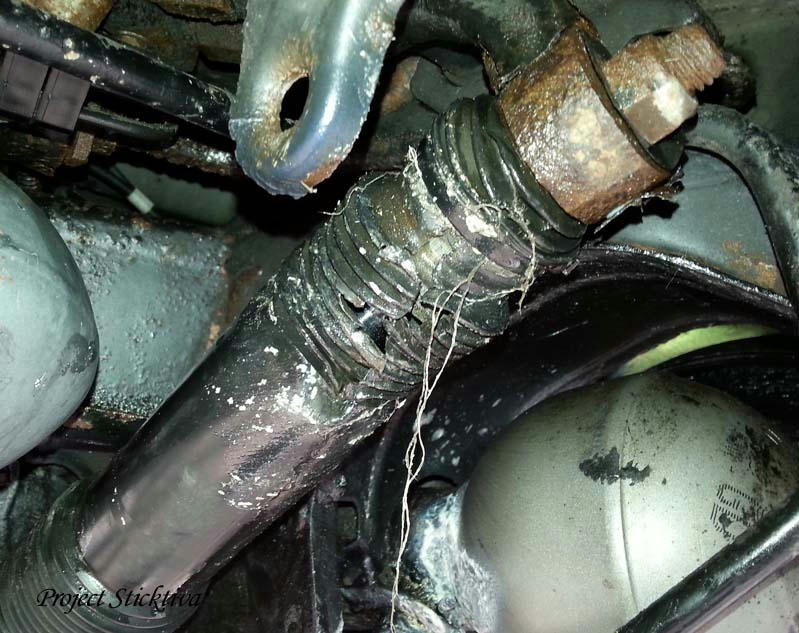
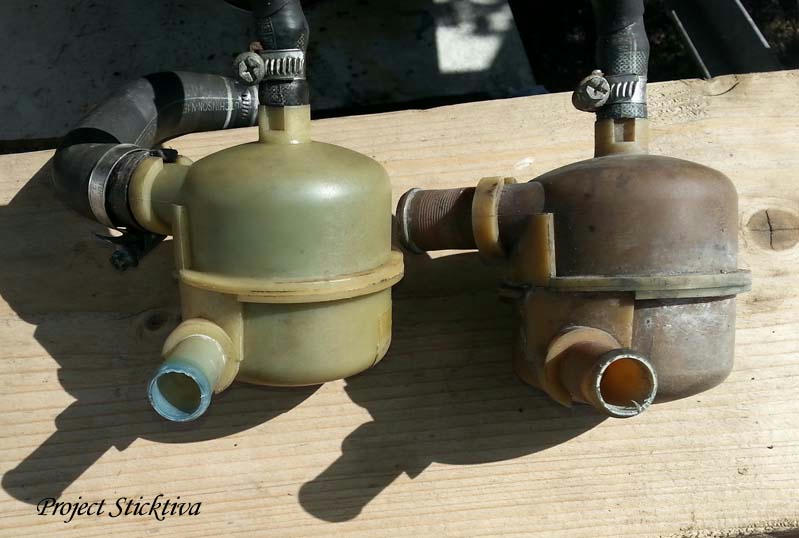
Here we see the header tank (taken from the spares car next to the one removed from this car. Note this is a prime example as to how these parts fail, note the staining at the leaking seam.
This spreading is DIRECTLY caused by the type of (1980's) plastic used combined with limescale contaminating the type of seal used in production. 

NEVER USE TAP WATER in this ENGINE...it WILL KILL IT....Use ONLY Distilled Water
My advice is to drain and refill with distilled water/AFz mix for 1 month, change that each month for every two years of the cars age.

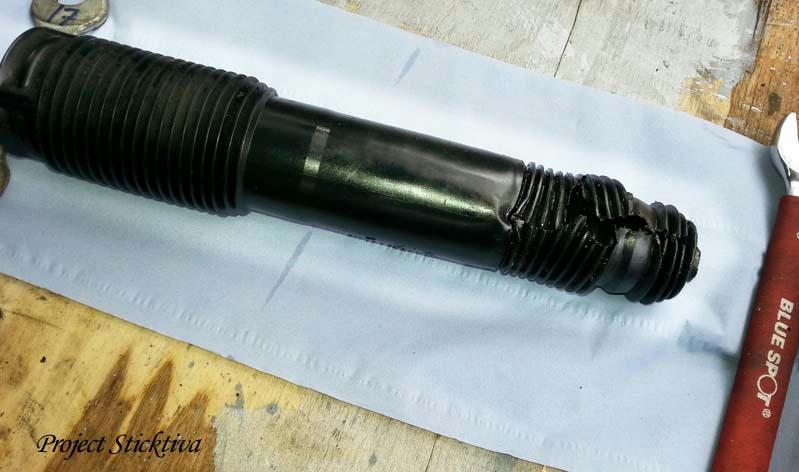
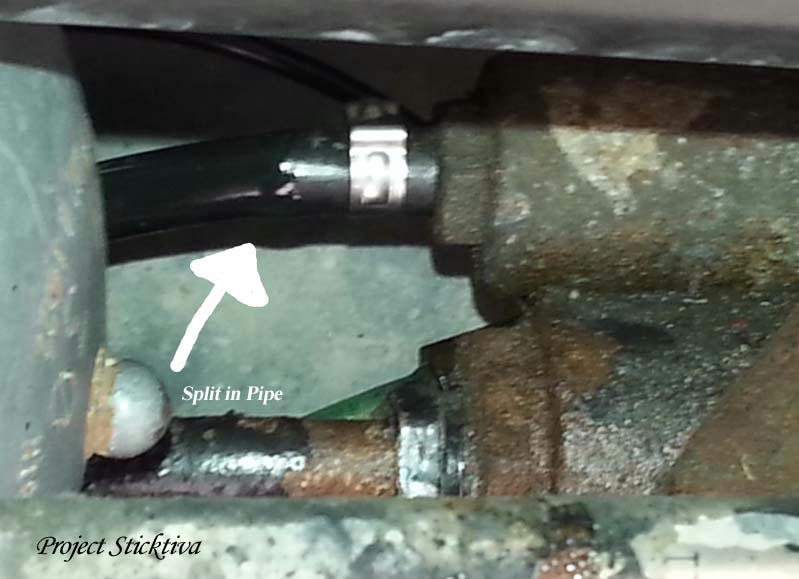
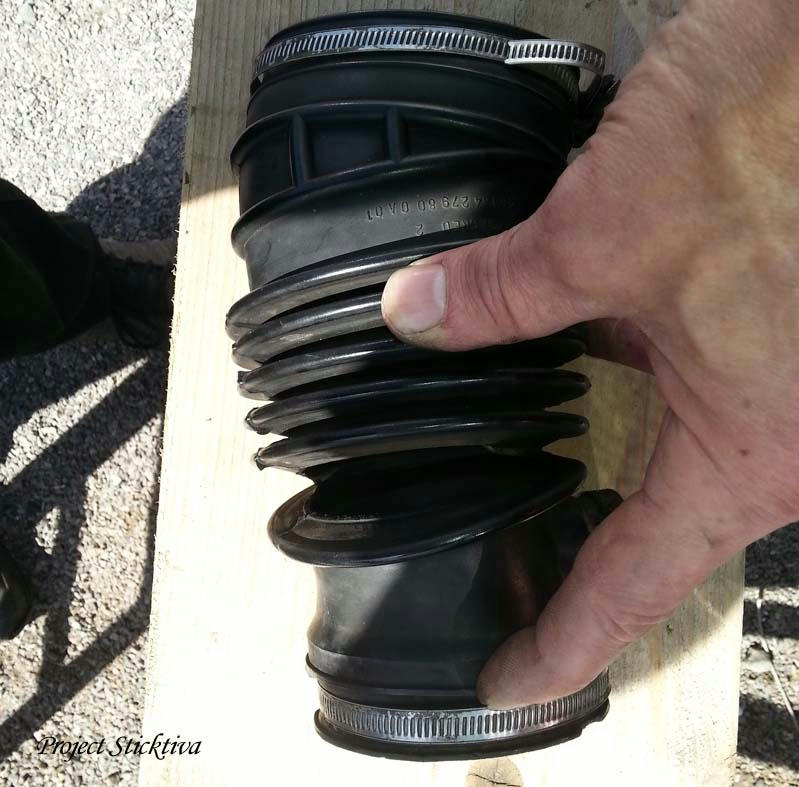
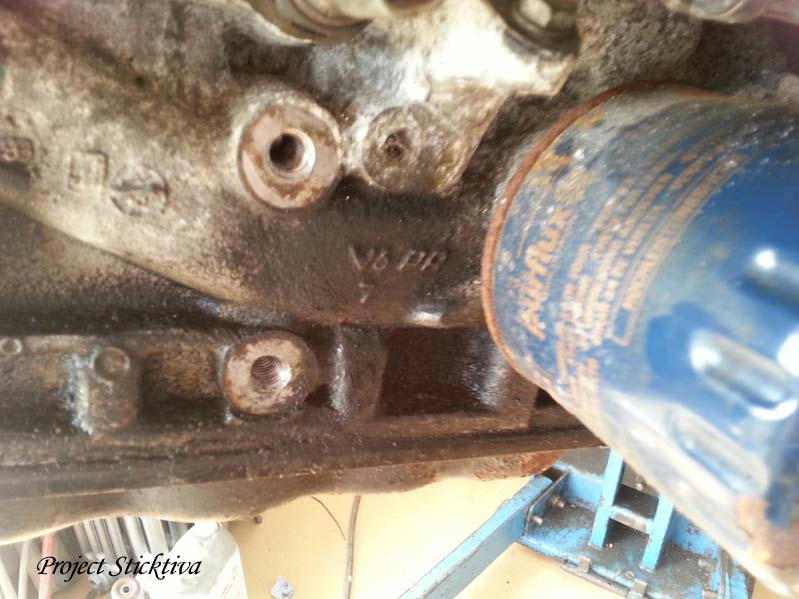
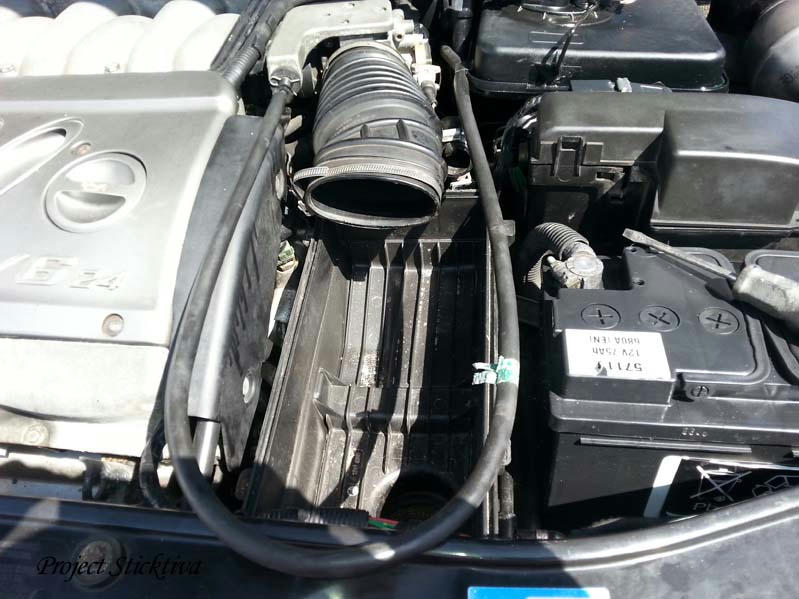
I discovered a few other problems on the way, here I found a split induction tube.


The Green Goblin one is a good spare so I will refit it with that one.
.....nice to have a spares car !

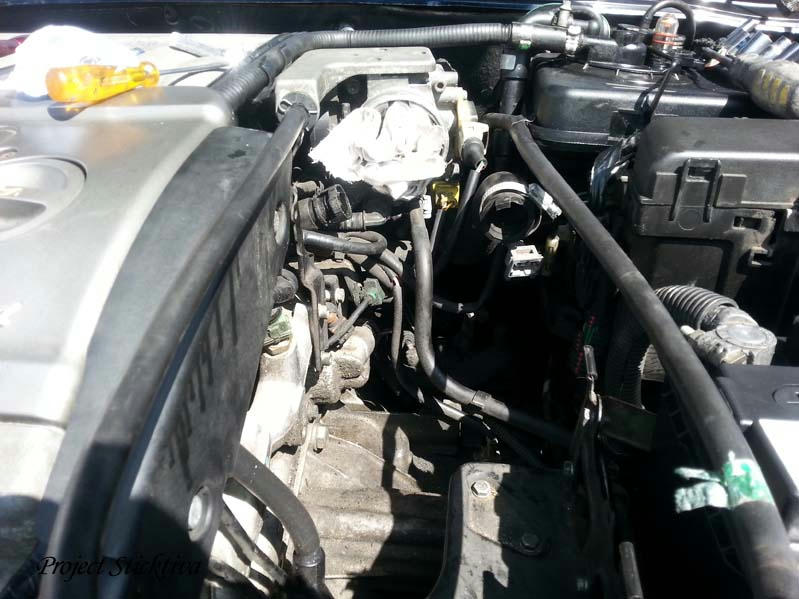
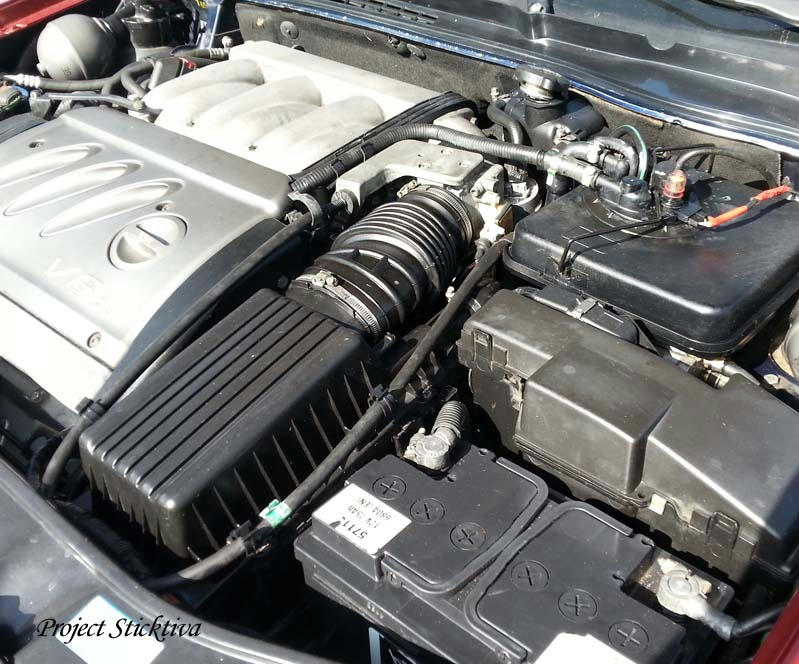
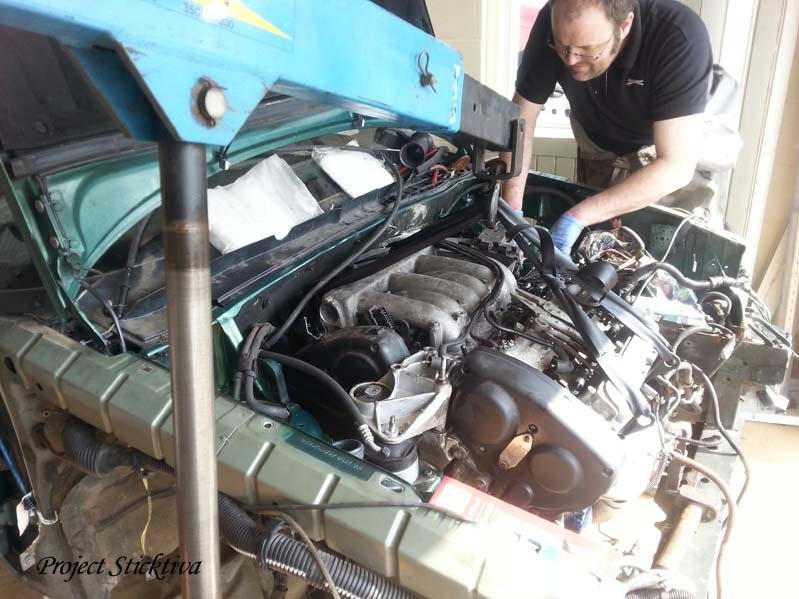
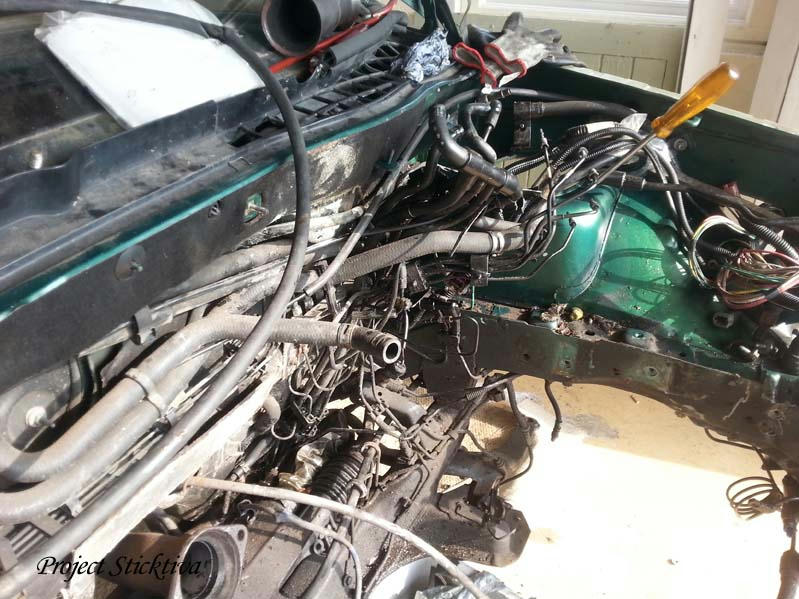
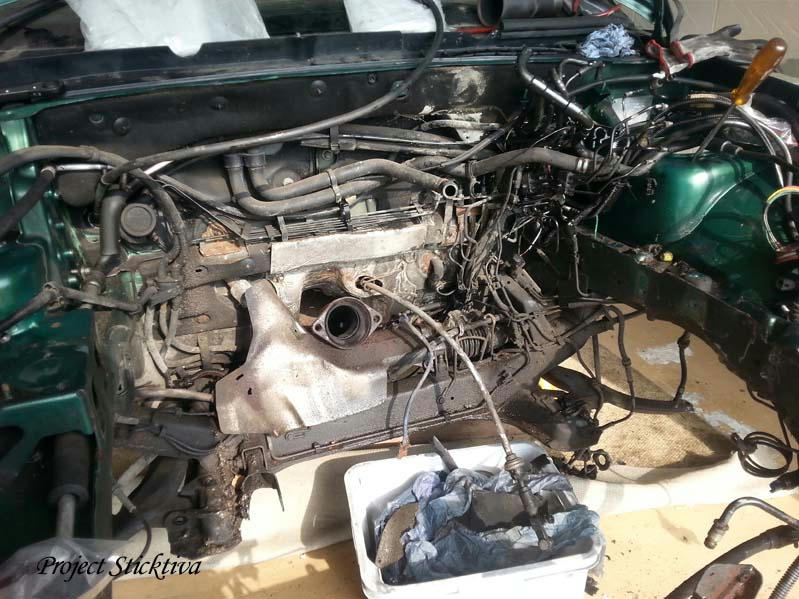
So I took off the Induction/air filter pipe work and box. I removed the Header Tank taking care with the sender unit and pipes which must be remove before being able to extract the tank.


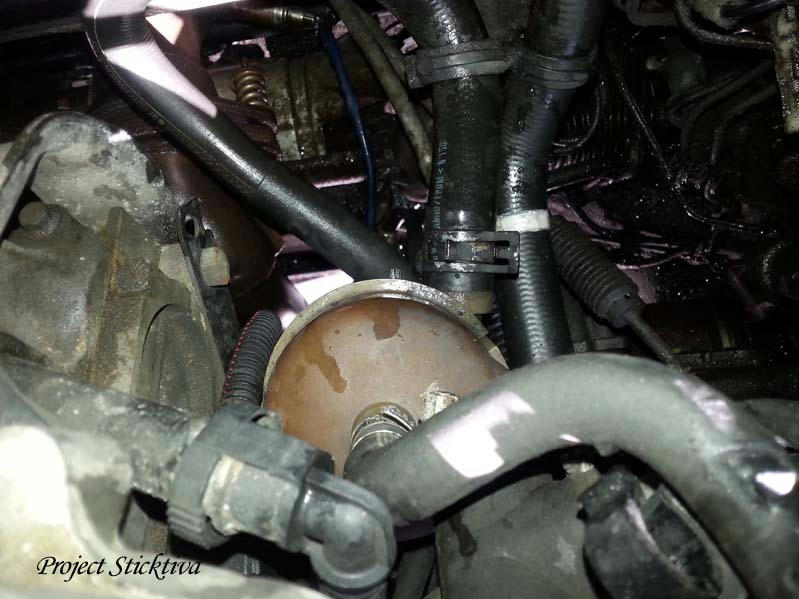
I now have better access to the Degass Tank, that's better, yes I have long arms and will have to lay over the engine....scratches here we come.


More tomorrow.


Sunday 12 April 2015

 Saturday and Sunday.....days of rest ??...nope

Well I am waiting to go to the Citroen Main Dealer in Glastonbury for some seals, o-rings ect  so I can start the repair to the Active Ram next week.

Yesterday and today I had visits from two French Car Forum Members.....Messrs "chinkostu" and "CitroJim"...
Hi guys, Activa cloth seats gone to a nice home and Jim with his head full of solutions for my problems :)

Whilst waiting for Monday I decided to switch my headlamps to RHD ones from the 2ltr Activa S1 spares car.  However, both shells had damaged lower mounts as well as one of the French cars original lights.  I had to hash together a full set from all the parts, never mind it gave me the chance to investigate the mounting of a set of Projector lamps in each shell and install a clear lens, anyway job done, lights are good and have Hi-Power bulbs fitted.

Tonight I started to dissemble the instrument binnacle from the 2ltr Activa to see how it fitted together and be ready to switch over the Speedo to a MPH version into the V6. 


This is what I have found....a nice and easy switch over IF the calibration is the same ( I have asked, wonder if anybody will know).


Saturday 11 April 2015

I have now started to do some cleaning and preparation on the underside of the V6 Activa.

I first wanted to investigate the leak on the rear Active Ram.
We all know know about Jim's modifications and re-seals of these expensive bits of kit.
The Activa owners really are all in his debt.

I decided to de-grease the whole underside rear, this was the only way as everything was soaked in LHM+
This is the view once fully air dried.
We see a quality French repair (lol) and the leak point, Jim tells me its the top seal and is an easy fix....we shall see.

I noticed the only bit of corrosion on the Car at this point. I will clean the pipe and union and decide once I can see how deep the damage is, if I will  protect and paint or replace.


A sunny day and to hot to get all oiled up, so I wire brushed a caliper ready for painting. I still have to clean the tight areas and around the seals with a Dremmel....but you can see the difference 18 years of crap makes.

Wednesday 8 April 2015


Some connectors I did not touch as I was a little unsure as to the technique in removing them.

There are many different types...each with its own dastardly child proof removal method.


Ready...I think


After my strip down and scavenging work
a friend (very experienced) assisted in the final checks.


Steady, good old seatbelts :)


LIFT >


Empty and
heartless for
the last time


got to laugh...PROOF ....it IS a V6 :)


Today the Green Goblin has its heart ripped out....this is the final day it can be called a Car....Sad

RIP the Green Goblin.............Rappelez-vous le Bouffon Vert


And look who wants to see
....strange things float by my window

Monday 6 April 2015

Sunday 5 April 2015


Total CLEAN Day

After yesterdays deep wash, today I tackled the interior and the paintwork.

Clay Bar, wash, machine applied 3\M scratch remover, detailers polish, buff with machine then finishing wax by hand.

All seats cleaned and washed/leather feed then polish cream.

  All plastic washed down (geeze it was dirty) then sealed with a general plastic "wax" and buffed

...........took AGES so I hope you think the results are good.

Saturday 4 April 2015

THANK GOODNESS for that !

Well today has been a very pleasant day with many good things appearing as it drew to a close.

After a late start I decided today was the day that I would do a very detailed inspection of all the body work on the Activa V6, I always do this during a very detailed cleaning.

I find it is the very best way of inspecting each area of the car in a systematical way.

The results I was VERY happy with, it is 100% better than I had hoped (was sure of) for.

(note: the car has had a respray, but a good one so NP.  Originally blue......but hey ! it is after all 18 years old )


There were many reasons I sourced the car in France, this being one of the TWO Primary needs !


NO RUST !
I am close to thinking that this is one of the best of the breed, a truly great find.

Straight as a die and clean as a whistle. .........RESULT !